

Easy Cake Decorating for Beginners: 12 Simple Ideas
Editorial TeamTable of Contents
- Why Easy Cake Decorating Is About Technique, Not Talent
- Simple Cake Decorating Tools for Beginners: What You Actually Need
- Step 1: Level and Fill Your Cake Layers
- Step 2: Apply a Perfect Crumb Coat
- Step 3: Easy Buttercream Piping Techniques for a Smooth Finish
- Step 4: How to Use Sugar Paste Toppers for Instant Impact
- Common Mistakes Beginners Make (And How to Avoid Them)
- Conclusion: Start Simple, Celebrate Every Bake
- Frequently Asked Questions
Last Updated: September 6, 2026
Why Easy Cake Decorating Is About Technique, Not Talent
Most people assume that easy cake decorating for beginners requires natural artistic ability. The truth is far more encouraging: it comes down to a handful of repeatable techniques, the right tools, and a little patience.
At Simply Toppers, we have spent over a decade helping home bakers create professional-looking cakes by focusing on fundamentals rather than innate talent.
Below, we walk through five core steps: levelling your layers, applying a crumb coat, piping buttercream, and adding sugar paste toppers for instant impact.
Simple Cake Decorating Tools for Beginners: What You Actually Need
You do not need a cupboard full of specialist equipment to begin. A small, well-chosen kit covers most beginner projects.
The Essential Kit: Turntable, Spatulas, and Scraper
A cake turntable lets you rotate the cake smoothly while you frost, which is the secret to even coverage (kingarthurbaking.com). An offset spatula helps you spread buttercream without your knuckles dragging through it. A bench scraper, held against the side of the spinning cake, creates those clean, smooth sides that look so professional.
Add a piping bag with a few nozzles, and you have everything needed for the techniques in this guide.
Budget-Friendly DIY Alternatives That Work
Short on cash? A lazy Susan from a charity shop works as a turntable. A clean plastic ruler substitutes for a bench scraper. Even a sturdy sandwich bag with the corner snipped off can pipe a basic buttercream border in a pinch. These simple cake decorating tools for beginners cost almost nothing and deliver surprisingly good results.
Step 1: Level and Fill Your Cake Layers
A cake that leans looks homemade, no matter how pretty the frosting. Levelling fixes this in minutes.
Place your cooled cake layer on the turntable. Using a long serrated knife, saw gently across the top dome, keeping the blade horizontal. Rotate the cake as you cut to maintain an even line. Aim to remove just the dome, leaving the cake as tall as possible.
For filling, pipe a ring of buttercream around the outer edge of the layer, then fill the centre with jam, curd, or extra buttercream. The ring acts as a dam, stopping the filling from squishing out the sides when you place the next layer on top.
Step 2: Apply a Perfect Crumb Coat
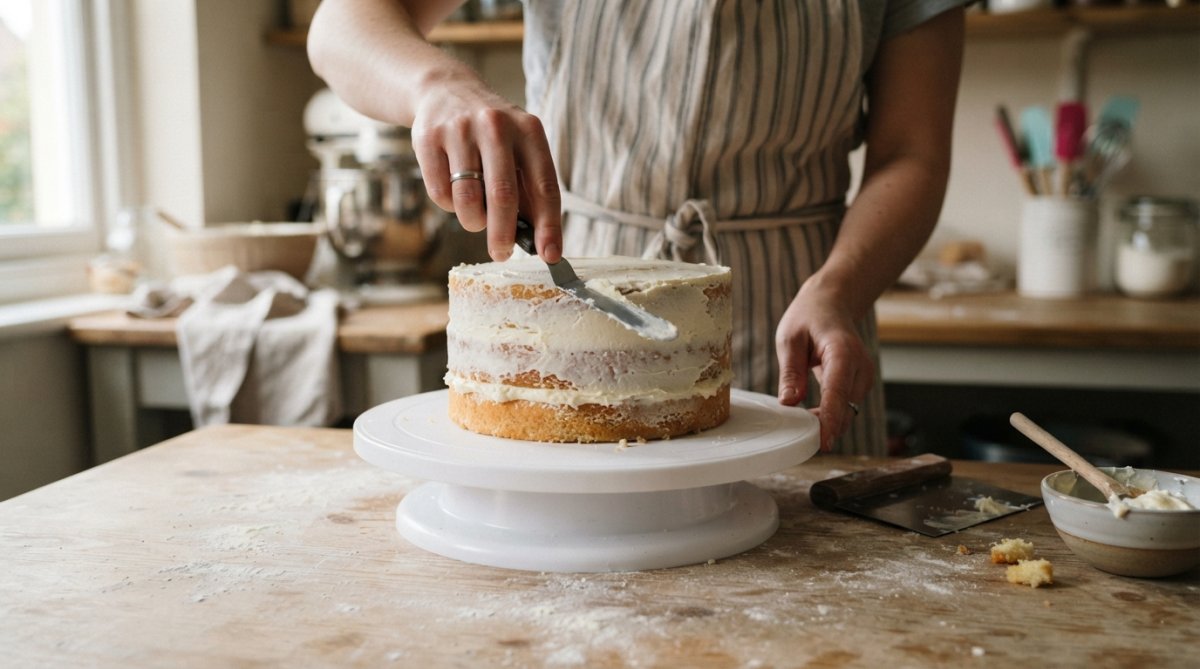
The crumb coat is a thin layer of buttercream that seals in the crumbs before your final frosting. It is the single most effective trick for achieving a smooth finish, and it is remarkably forgiving.
Why the Crumb Coat Matters Structurally
Beyond trapping crumbs, this layer creates a 'tacky' surface that your final coat of buttercream can adhere to. Without it, your finishing layer can slide or slump, especially on a cake with a soft filling like jam or curd.
The Technique: How to Apply It Like a Pro
- Start with a fully chilled cake. After levelling and filling, pop the assembled cake in the fridge for 15-20 minutes. This firms up the filling and makes the cake less fragile to handle.
- Apply a thin layer. Using your offset spatula, spread a small amount of buttercream over the top and sides. The goal is to cover the cake completely but thinly, you should just barely see the sponge through the frosting. Don't worry about perfection here; the goal is simply to trap the crumbs.
- Use a bench scraper for the sides. Hold the scraper against the side of the cake while spinning the turntable. This will push the buttercream into the sponge and create a rough, even surface. Don't worry about smoothness at this stage.
- Chill again, and this is non-negotiable. Once the cake is fully coated, place it in the fridge for at least 30 minutes, or up to an hour. This creates a firm base so your final coat glides on cleanly without dragging crumbs through the surface. If you skip this, the crumb coat will tear, and crumbs will mix into your final layer.
Troubleshooting Common Crumb Coat Problems
Even with the best intentions, things can go wrong. Here is how to fix the most common issues:
- Problem: The crumb coat is too thick. A thick crumb coat can look lumpy and create a bumpy base. Use a warm, damp bench scraper to gently smooth it down before chilling. The warmth will melt the buttercream slightly, allowing you to glide over bumps.
- Problem: Crumbs are still showing through. This usually means your crumb coat is too thin or your cake was too warm. If you see crumbs, apply a second, even thinner crumb coat after the first has chilled.
- Problem: The crumb coat is pulling away from the cake. This happens when the buttercream is too stiff or the cake is too cold. Your buttercream should be at 'room temperature' (about 20°C in the UK) and spreadable (bbcgoodfood.com). If it's too stiff, let it sit out for a few minutes or warm your spatula under hot water and dry it off.
A Note on Buttercream Consistency for Crumb Coating
Your crumb coat buttercream should be slightly softer than your final coat, making it easier to spread thinly and cling to the cake. If you are using a standard buttercream recipe, add a teaspoon of milk or a splash of boiling water to loosen it slightly.
Step 3: Easy Buttercream Piping Techniques for a Smooth Finish
With the crumb coat chilled, apply your final layer of buttercream. Work in vertical strokes around the sides, then smooth with your bench scraper while spinning the turntable. Hold the scraper steady at a slight angle; the rotation does the work for you.
The consistency of your buttercream matters as much as your technique. For piping, you want a soft but firm texture that holds its shape. If your buttercream is too stiff, it will tear the cake; too soft, and your piping will collapse. A good test: pipe a small star, then stop. The point should hold without drooping.
Mastering the Star Nozzle for Border Designs
The star nozzle is a beginner's best friend. It hides imperfections, adds instant polish, and requires little practice to look good.
Fill your piping bag fitted with a star nozzle, twist the top closed, and squeeze gently while holding the nozzle just above the cake surface. For a classic shell border, squeeze, ease off pressure, and pull the nozzle away slightly to create a tail. Repeat around the bottom edge, the result looks intricate but takes minutes.
Simple Piping Tips for Cupcakes and Cakes
For cupcakes, the same star nozzle creates a lovely swirl. Start at the outer edge and work inward in a continuous spiral, finishing with a small peak in the centre. One skill set covers both cakes and cupcakes. upgrading kitchen tools.
Step 4: How to Use Sugar Paste Toppers for Instant Impact
Sugar paste toppers are a shortcut many home bakers use. They deliver a professional, polished look without complex piping skill, and they are particularly useful for themed celebrations.
Sugar paste toppers are pre-made edible decorations that sit directly on your frosted cake or cupcakes. Simply peel them from their backing, place them gently on the surface, and press lightly to secure. For best results, add them after your buttercream has formed a slight crust, usually 10 to 15 minutes after frosting.
If you are baking for guests with dietary requirements, check your toppers carefully. Simply Toppers makes handmade sugar paste toppers that are 100% vegan, vegetarian, and free from dairy and gluten, so everyone at the party can enjoy the decoration. Our 12 DIY Tools Cake Cupcake Toppers add a playful, crafty touch to birthday bakes, while the 18 Coloured Vegan Edible Cupcake Toppers - Square Cake Decoration Buttons bring simple colour and charm to any sponge. Both are handmade and arrive ready to place, which takes the pressure off beginners who want impressive results without complex piping.


| Technique | Time Needed | Skill Level | Impact |
|---|---|---|---|
| Levelling layers | 5 minutes | Beginner | Stops leaning cakes |
| Crumb coat | 10 minutes + chilling | Beginner | Enables smooth finish |
| Star nozzle border | 10 minutes | Beginner | Hides imperfections |
| Sugar paste toppers | 2 minutes | Anyone | Instant professional look |
Common Mistakes Beginners Make (And How to Avoid Them)
Every baker makes these errors at some point, and they are easy to fix once you know what to look for. Beyond the usual pitfalls, one challenge catches many UK home bakers off guard: the weather.
The Usual Suspects: Quick Fixes for Classic Errors
Skipping the chill. Warm cakes crumble, warm buttercream melts, and warm ganache runs. Chill your crumb-coated cake for at least 30 minutes, and your final decorated cake for at least 15 minutes before serving.
Overfilling the piping bag. A bag filled to the top is hard to control and leaks. Fill it no more than two-thirds full, and twist the top securely to create pressure. This gives you better control and prevents the dreaded 'buttercream explosion'.
Frosting a warm cake. Buttercream on a warm cake will slide off in patches. Always ensure your cake is completely cool before you begin, this is the most common cause of ruined finishes.
Adding toppers too early. If you place sugar paste toppers on wet buttercream, they can slide or dissolve. Wait for the frosting to crust slightly, then add your decorations.
The Climate Factor: Decorating in the UK's Humidity and Heat
In the UK, our homes can be surprisingly warm in summer, and our kitchens can get humid even on cooler days.
The Problem with Humidity: On a damp day, buttercream can absorb moisture from the air, making it soft, sticky, and difficult to pipe. Your star borders may lose their definition and start to droop, and sugar paste toppers can become tacky and lose their crisp edges.
The Problem with Heat: In a warm kitchen (above 24°C), the fat in your buttercream begins to soften and melt, causing your cake to slump, your crumb coat to slide, and your piping to lose its shape entirely (scientificamerican.com).
How to Decorate Successfully in Any UK Weather
Here is a practical, step-by-step approach to protecting your hard work:
- Check the forecast. This sounds obvious, but it's the first thing professional bakers do. If a hot, humid day is forecast, decorate early in the morning when the house is coolest.
- Work in a cool room. If you have air conditioning, use it. If not, open windows to create a cross-breeze, or work in the coolest room in the house, often a north-facing kitchen or a shaded conservatory.
- Chill strategically, not constantly. Taking a cake straight from the fridge to a warm room can cause condensation to form on the surface. This 'sweating' can make your buttercream look blotchy and cause your toppers to slide. After decorating, let the cake sit at room temperature for 10-15 minutes before serving to allow any condensation to evaporate.
- Adjust your buttercream for the weather. On a hot day, use a recipe with a higher ratio of icing sugar to butter. You can also add a teaspoon of meringue powder or a tiny pinch of cream of tartar. On a humid day, avoid adding any extra liquid (like milk or flavouring syrups).
- Transport with care. If you are transporting a cake on a warm day, keep the air conditioning on in the car and place the cake box on the floor, away from direct sunlight. For longer journeys, place a frozen ice pack under the cake board (but not touching the cake itself) to keep the base cool.
The 'Prep-Ahead' Schedule for Stress-Free Decorating
Another mistake beginners make is trying to do everything in one day. Baking, cooling, filling, crumb coating, final frosting, and decorating in a single session is overwhelming and leads to rushed, sloppy work. Instead, break the project across two days:
- Day 1 (The Bake): Bake your cakes, let them cool completely, wrap them tightly in cling film, and store them in the fridge overnight. This not only saves time but makes it easier to level and fill.
- Day 2 (The Decorate): Level, fill, and crumb coat your cake in the morning. Chill it for an hour. Then, apply your final coat of buttercream and your decorations in the afternoon. This staggered approach keeps every step fresh and prevents fatigue.
Buttercream cakes can sit at room temperature for a few hours at a party, but sugar paste decorations last longest when the cake is kept cool and out of direct sunlight. If you are baking for a celebration, consider frosting the day before and adding toppers on the day itself.
Conclusion: Start Simple, Celebrate Every Bake
The gap between a basic frosted cake and one that draws compliments is smaller than you think. Master the crumb coat, learn one piping technique, and use quality sugar paste toppers, and you will produce cakes you are genuinely proud of.
At Simply Toppers, we have created handmade, allergen-friendly decorations since 2013, winning awards including the Free From Food Awards 2025 and Scotland's Prestige Awards 2025/2026 for Cake Decorating Service of The Year. Our toppers are designed for bakers of every skill level, so you can decorate with confidence, knowing your creations are safe for everyone to enjoy. Get started with Simply Toppers and make your next bake extra special.
Frequently Asked Questions
What is the easiest way to decorate a cake for a beginner?
Start with a smooth buttercream finish and add a simple border using a star nozzle. Once the crumb coat is set, pipe rosettes or dots around the top edge. Finish with a sugar paste topper or fresh fruit in the centre. These techniques hide minor imperfections, look polished, and only need a turntable, an offset spatula, and a piping bag.
Can I decorate a cake at home without professional tools?
Yes. A dinner plate can substitute for a turntable, a butter knife works in place of an offset spatula, and a sturdy food bag with the corner snipped off can stand in for a piping bag. For a smooth finish, run the flat side of a large knife under hot water, dry it, and glide it over the buttercream. Simple cake decorating tools for beginners are helpful, but not essential.
How do I use sugar paste toppers on a buttercream cake?
Place sugar paste toppers on the cake shortly before serving to prevent colours bleeding. Gently press them into the buttercream so they stick without sinking. For larger toppers, support them with a small dot of fresh buttercream. If the topper feels firm, let it soften at room temperature for a few minutes first. This works on frosted cakes, cupcakes, and even naked cakes.
What buttercream piping techniques are easiest for beginners?
Master the star nozzle first. It hides uneven pressure and creates attractive swirls, shells, and borders. Hold the piping bag at a 90-degree angle for stars and rosettes, squeezing steadily while lifting slightly. For a classic shell border, squeeze, ease off, and drag the nozzle to create a tail. Practise on a plate before piping onto the cake.