

How to Decorate Cakes at Home: A Beginner's Guide
GrandrankerTable of Contents
- Essential Cake Decorating Tools for Home Bakers
- How to Decorate Cakes at Home: Preparing Your Layers
- Making and Smoothing Buttercream Frosting
- Piping Bag and Nozzle Techniques for Beginners
- Easy Cake Decorating Ideas for Beginners
- How to Use Sugar Paste Toppers to Decorate Cakes at Home
- Conclusion
Last Updated: August 17, 2026
Essential Cake Decorating Tools for Home Bakers
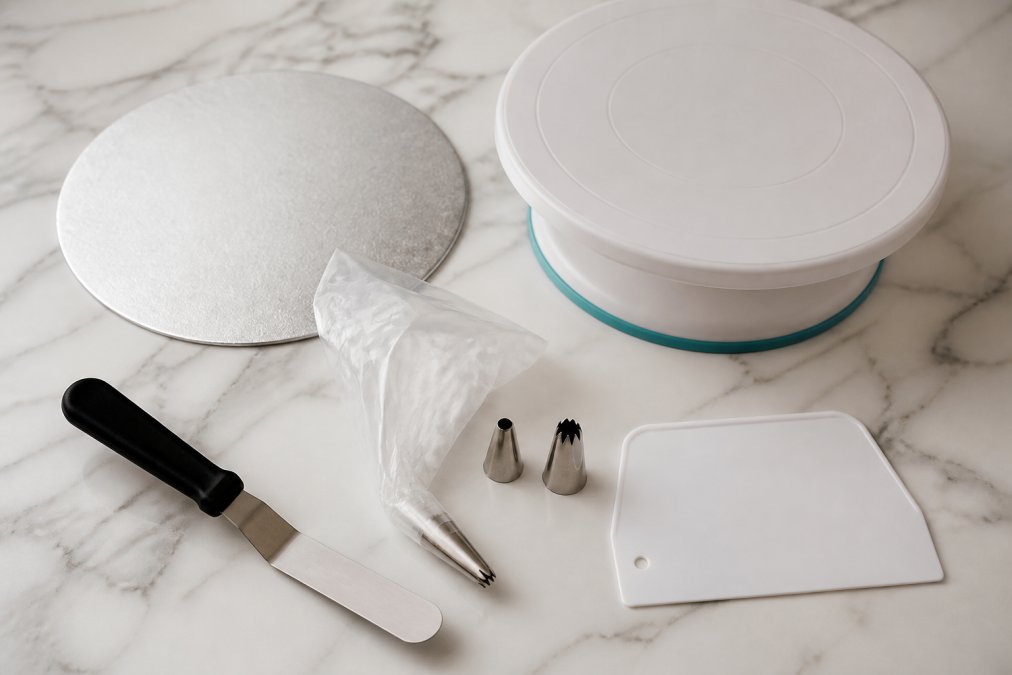
The difference between a homemade cake and an impressive one comes down to three essential tools: a turntable, an offset spatula, and a cake scraper. A turntable lets you rotate the cake smoothly while applying frosting for a clean, even finish. An offset spatula's angled blade keeps your knuckles clear and gives better control than a flat knife. A cake scraper creates the sharp, smooth finish seen on bakery cakes.
Beyond these essentials, a piping bag with a few nozzles opens up decorative options. Beginners need only a round tip for lettering and dots, a star tip for rosettes and shells, and a large open star for swirls. A cake board provides a stable base and makes moving the cake easier.
Budget-Friendly Alternatives to Professional Equipment
Professional kits are expensive, but good results don't require them. A heavy bowl on a damp cloth mimics a turntable. A zip-lock bag with a snipped corner works as a basic piping bag. A flat-sided glass or ruler can substitute for a cake scraper.
According to the British Baking Association's guidance on home baking equipment, starting with versatile tools and building gradually is more effective than buying a full kit at once. Invest first in an offset spatula and turntable, then add piping nozzles and a coupler as skills grow.
How to Decorate Cakes at Home: Preparing Your Layers
Preparation determines whether a decorated cake looks professional or amateurish. A beautifully decorated cake that leans or has visible gaps between layers will disappoint regardless of frosting quality.
Levelling and Torting Your Cake
Levelling removes the domed top to create a flat surface. Torting slices the cake horizontally into thinner layers for filling. Both are essential for a professional finish.
Let the cake cool completely before levelling, warm cakes crumble. Use a long serrated knife with a gentle sawing motion, keeping the blade parallel to the work surface. A cake leveller tool helps, but a steady hand works fine.
For torting, mark the desired height with cocktail sticks around the circumference, then use them as a guide. Two or three layers is ideal: enough filling for flavour and height without instability.
Applying a Crumb Coat
A crumb coat is a thin buttercream layer applied before the final coat to trap loose crumbs. Skipping this step is the most common beginner mistake.
Apply the crumb coat thinly with an offset spatula over the top and sides. Chill for at least 20-30 minutes until firm, then apply the final buttercream layer.
Making and Smoothing Buttercream Frosting
American buttercream, made from butter and icing sugar, is the most forgiving for beginners. It's stable, colours easily with gel food colouring, and pipes cleanly.
The basic ratio is roughly two parts icing sugar to one part butter by weight, with milk or cream to adjust consistency. Beat the butter until pale and fluffy, then gradually add icing sugar. Rushing this produces a grainy texture. A stand mixer helps, but a hand mixer works well.
Consistency matters more than most realise. Too stiff tears the cake; too soft won't hold shape. The right consistency holds a soft peak and spreads easily. Add milk a teaspoon at a time if too thick, or icing sugar gradually if too thin.
Achieving a Smooth Finish with a Cake Scraper
Hold the cake scraper at a slight angle against the chilled cake's side and rotate the turntable steadily. Keep the scraper still and let the turntable move. Work in two or three passes, smoothing the top last with an offset spatula. For a very sharp edge, chill again and do one final pass with a warm scraper.
Climate and Humidity: What Changes Your Results
Humidity and temperature significantly affect buttercream and royal icing. In warm kitchens, buttercream softens quickly; chill the cake more frequently. In cold kitchens, let buttercream sit at room temperature for 10-15 minutes before spreading. Stabilised whipped cream holds better in warm conditions. High humidity makes royal icing and fondant sticky; work in the coolest, driest part of your kitchen.
Piping Bag and Nozzle Techniques for Beginners
Most beginners grip piping bags too tightly and squeeze inconsistently. Hold the bag with both hands: dominant hand at the top applying steady pressure, non-dominant hand guiding the tip. Keep the bag vertical for dots and rosettes, angled at 45 degrees for shells and borders.
Consistent pressure is everything. Practise on baking parchment before touching the cake. Most people need 10-15 minutes of practice before feeling comfortable.
Essential piping techniques:
- Rosettes: Use a star tip held vertically. Apply pressure to create a centre dot, swirl outward in a circle, and release as you return to start.
- Shells: Use a star tip at 45 degrees. Apply pressure, let frosting fan out, then drag toward you while releasing to form the tail.
- Dots: Use a round tip held vertically. Apply even pressure until the dot reaches desired size, then stop before lifting to avoid a peak.
- Writing: Use a round tip. Practise the message on parchment first. Apply light, even pressure and move smoothly.
According to the Craft Bakers Association's resources on decorating techniques, consistent piping pressure is the most frequently cited difficulty among beginners, cured only by deliberate practice before working on the actual cake.
| Piping Tip | Best For | Difficulty Level |
|---|---|---|
| Star tip (closed) | Rosettes, shells, borders | Beginner |
| Round tip | Dots, writing, outlines | Beginner |
| Open star tip | Swirls, cupcake peaks | Beginner |
| Petal tip | Flowers, ruffles | Intermediate |
| Basketweave tip | Textured sides | Intermediate |
Easy Cake Decorating Ideas for Beginners
Beginners often choose decorations requiring skills they haven't built yet. Start with forgiving techniques: drip cakes, textured buttercream, and sugar paste toppers all look impressive but are beginner-friendly.
Creating a Drip Cake Effect with Ganache
A drip cake is visually striking and genuinely beginner-friendly once you understand ganache temperature. Heat double cream until it just simmers, pour over finely chopped chocolate, and stir until smooth. Let it cool until warm enough to flow but not so hot it runs straight down. Test on a cold spoon first.
Apply the drip with a spoon or squeezy bottle around the top edge of a chilled cake, letting each drip fall naturally. Fill the top with remaining ganache and spread smooth.
Stacking Cake Layers Like a Pro
Stacking multiple tiers requires dowels or bubble straws inserted into the lower tier to support the upper tier's weight. Without support, the upper tier compresses the lower one, squeezing out filling and causing leaning.
For a two-tier cake, insert four dowels in a square pattern inside where the upper tier sits, cut them flush with the top, then place a thin cake board under the upper tier before stacking.
How to Use Sugar Paste Toppers to Decorate Cakes at Home
Sugar paste toppers are the fastest way to add a professional finish without advanced piping skills. These pre-made, edible decorations sit on top of the frosted cake.
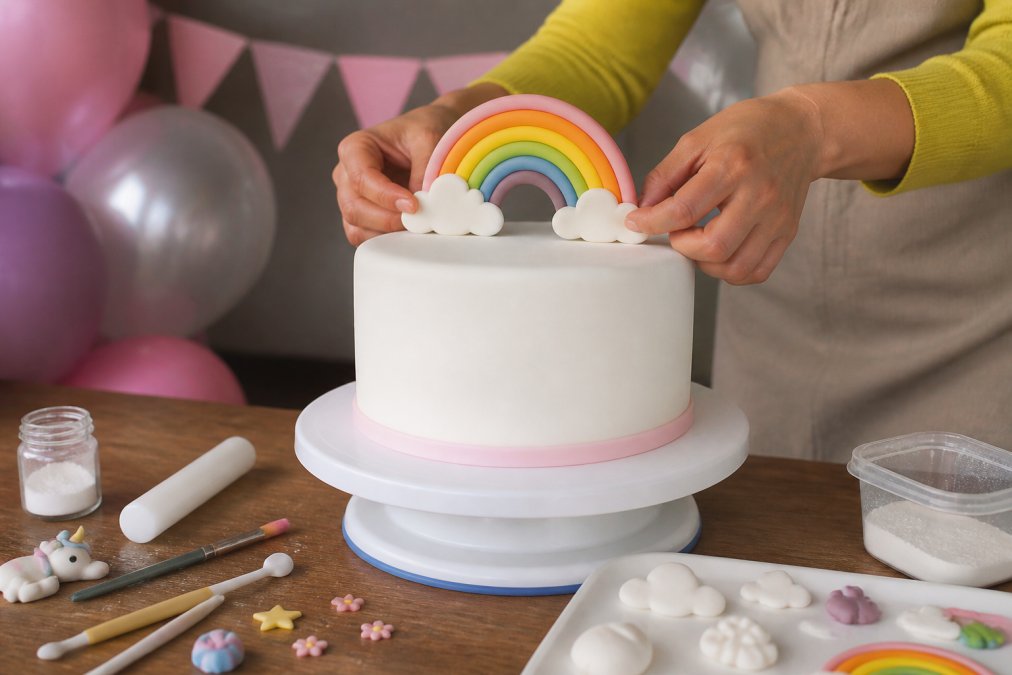
Simply Toppers has made handmade edible decorations since 2013, covering birthdays, baby showers, and seasonal holidays. Every topper is 100% vegan, vegetarian, dairy-free, and gluten-free.
To place a topper, ensure the buttercream or fondant surface is slightly tacky, not wet or fully set. Press gently and hold for a few seconds. If the surface has dried, apply a tiny amount of water or edible glue with a brush. Position the topper before the final frosting coat fully sets for the most secure result.
Allergen-Friendly Decorating for Dietary Requirements
Decorating for guests with food allergies requires attention at every stage: sponge, filling, frosting, and decoration. Under the Food Information for Consumers Regulation (EU FIC) as retained in UK law, the 14 major allergens must be declared in food prepared for sale. While home baking for personal parties sits outside that scope, the same care is good practice.
A common mistake is assuming one "gluten-free" ingredient is enough. Cross-contamination during preparation is a real risk. Use separate bowls, utensils, and work surfaces when preparing allergen-free elements, and check every ingredient label individually.
Simply Toppers' toppers are dairy-free and gluten-free, making them genuinely safe for guests with these requirements. The brand's Gold win in the Free From Food Awards 2025 (Halloween section) and Bronze Award in the grocery section reflect independent recognition of that commitment.
For vegan frosting, swap butter for plant-based alternatives (coconut oil-based blocks work better than spreads) and use plant-based milk for consistency. Gel food colouring is typically vegan, but always check the label.
Decorating cakes at home takes practice, but the gap between a first attempt and an impressive result is smaller than most expect. The techniques here, from a solid crumb coat to confident piping pressure, are the same ones professional bakers use, just applied at home scale. For the finishing touch, Simply Toppers' handmade, allergen-friendly sugar paste toppers add a polished, celebratory look without advanced decorating skills. Browse the full range and use the Quick Order Form to find the perfect topper for your next occasion.
Frequently Asked Questions
What is the easiest way to decorate a cake at home for beginners?
The easiest starting point is a smooth buttercream finish topped with ready-made sugar paste toppers. Apply a crumb coat first, chill the cake for 20-30 minutes, then add your final layer of buttercream and smooth it with a cake scraper. Once chilled again, simply press your toppers onto the surface. No advanced piping skills needed, and the result looks genuinely polished with minimal effort.
Can you decorate a cake the day before a party?
Yes, and it is often better to do so. Decorating the day before gives buttercream time to set firmly, makes transporting the cake easier, and reduces last-minute stress. Sugar paste toppers placed on a fully chilled, set buttercream surface hold their shape well overnight. Store the finished cake in a cool, dry place rather than the fridge if possible, as condensation can soften decorations and dull colours.
What are the best allergen-friendly options for cake decorations?
Look for decorations that are explicitly labelled dairy-free, gluten-free, and vegan, with clear manufacturing information. Sugar paste toppers made in a dedicated allergen-free facility offer the safest option for guests with conditions like coeliac disease or dairy intolerance. Simply Toppers produces handmade edible decorations that are 100% vegan, gluten-free, and dairy-free, and the range earned a Bronze Award in the 2025 Free From Food Awards, providing an extra layer of confidence for allergy-conscious bakers.
How do you get a smooth buttercream finish at home without professional tools?
Chill the crumb-coated cake until firm, then apply a generous second coat of buttercream at room temperature. Hold a straight-edged cake scraper flat against the side and rotate the cake on a turntable in one slow, steady motion. A tall plastic food container lid works as a DIY scraper if you do not own one yet. Warming the scraper briefly under hot water before each pass helps fill small gaps and removes drag marks for a cleaner result.
This article was written using GrandRanker